
Adding a Company Name and Address to Paycheck Stubs
Last modified by Peytience S on 2023/11/01 19:41
To add your company name and address to your checkforms:
- Go to the "Employee Information" screen.
- Go to the "Utilities" menu and select "Check Designer", this will open a template of your checkform.
- Go to the "Fields" menu and select "New Field".
- Change the middle dropdown menu to "Other Types".
- From the bottom dropdown menu, select "Company Name" and click "OK".

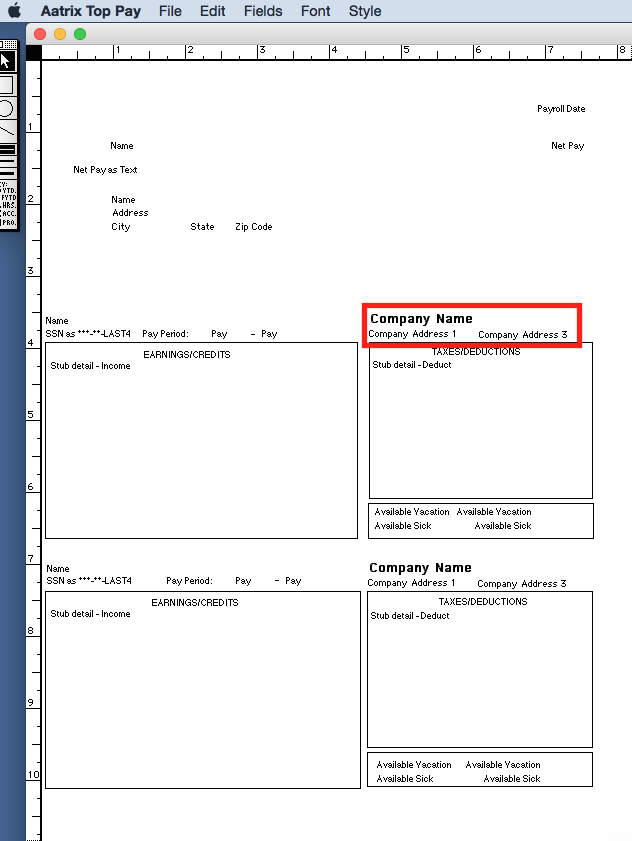
- It will put it in the upper left corner on the template and will have a black dot in all four corners around the field indicating it has been selected. With it selected, click and drag it to the approximate desired position on the paycheck stub, for example above the deductions box.
- You can also go to the "Font" menu and change the font. The "Style" menu gives you choices of the font size and other choices such as bold or italicized for the field selected.
- Go to the "Fields" menu and select "New Field".
- From the middle dropdown menu, select "Other Types".
- From the bottom dropdown menu, select "Address #1". This is the street address for the company.
- Again click and drag it to the approximate desired position and change the font size and style (if necessary).
- Go to the "Fields" menu and select "New Field".
- From the middle dropdown menu, select "Other Types".
- From the bottom dropdown menu, select "Address #3". This is the City, State and Zip Code for the company.
- Again click and drag it to the approximate desired position and change the font size and style (if necessary).
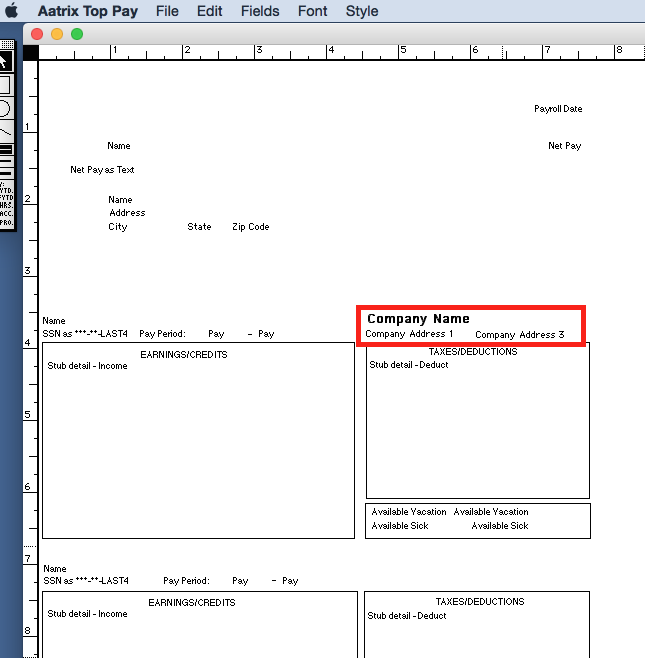
- Go to the "File" menu and select "Return to Company", save the changes when prompted.
- Select an employee from the list and click on "Pay History".
- Click on "Reprint" on the top tool bar and print it onto plain paper. Verify the alignment of the Company Name and address to one of the checks to be used for payroll.
- If the information needs to be moved, or resized, go back to the "Utilities" menu and select "Check Designer". Select the desired fields and move or resize as necessary.
- Once you have the information in the desired location on the top paycheck stub, go back to the "Utilities" menu and select "Check Designer".
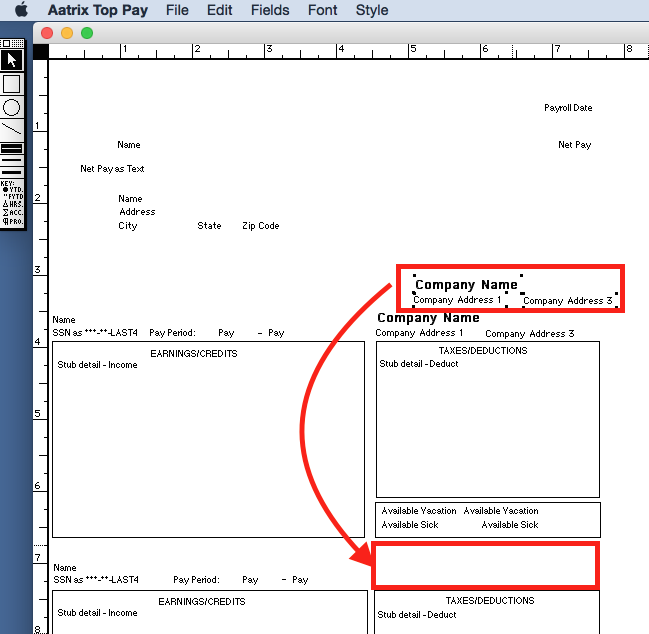
- Hold down the shift key and click on the "Company Name", "Address #1" and "Address #3" fields. The four dots placed around the items indicate they are selected.
- Go to the "Edit" menu and select "Duplicate". This will duplicate the fields and they will be pre-selected.
- Using the arrow keys on your keyboard move the duplicated fields into position on the bottom paycheck stub.
- When you have it moved, go back to the "File" menu and select "Return to Payroll" and save the changes when prompted.
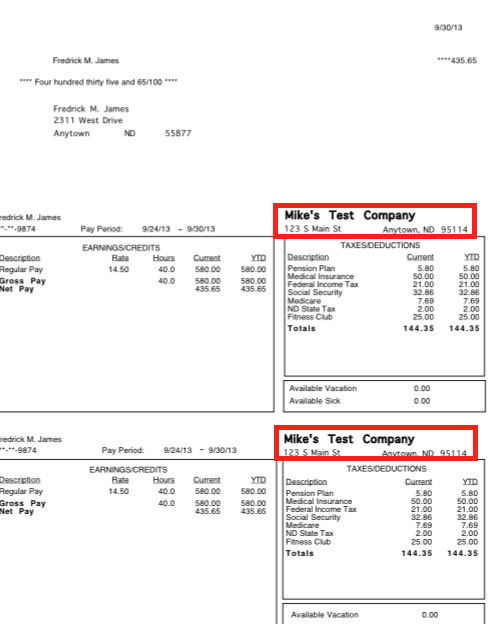
- Reprint the paycheck again and verify the display of the Company Name and address on the paycheck stubs.
- If further alignment is needed, go back to the "Utilities" menu and select "Check Designer". Follow the above steps for further alignment.
Related Pages:
Printing Paycheck Stubs in Quickbooks
FAQ: My checks are 3 per page and I will print the checks from Quickbooks. How do I get a paycheck stub for my employees?
Aligning Paycheck Printing
Learn how to align paychecks for printing.
Selecting a Checkform to Use
Learn how you can select checkforms from your Aatrix Payroll program.
Displaying SSN Numbers
FAQ: How do I remove the Social Security Number, or, have it display only the last 4 digits?
Adding Company Logo to Checks
Read on how to add your company logo to your checks.