Aligning Paycheck Printing
Last modified by andrew k on 2026/01/27 20:41
To align the checkform to the actual checks you use:
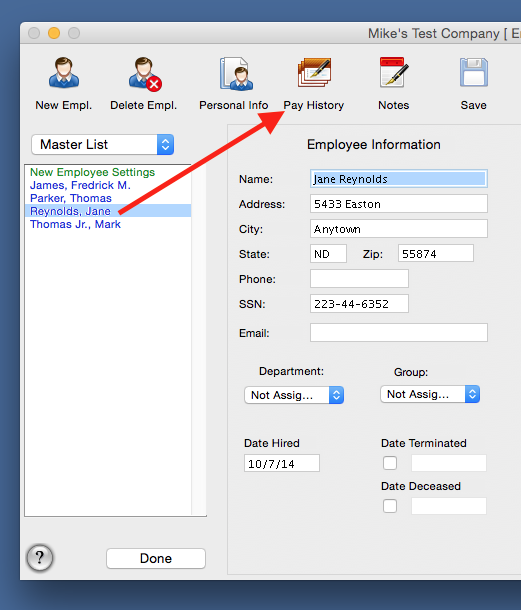
- In your payroll program, go to the "Employee Information" screen and select an employee from the list.
- Click on "Pay History" from the top tool bar.
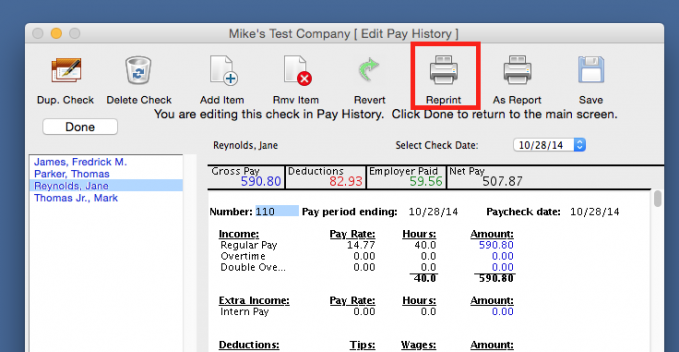
- With a check showing in the window for the employee, click on the "Reprint" button and print the check on plain paper.
- Take the printout of the check and hold it up against one of the actual checks you will be using and determine the direction the print needs to be moved and approximately how much.
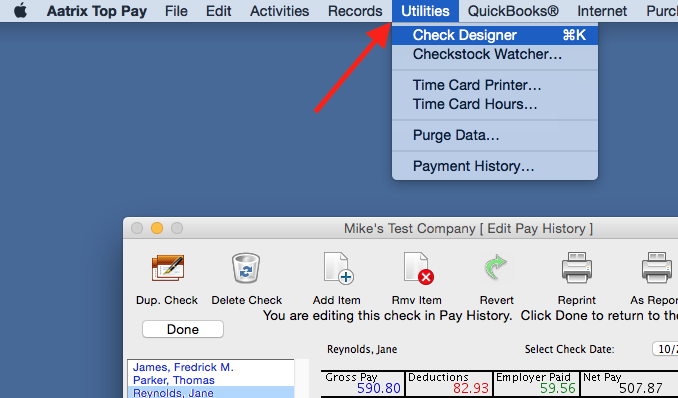
- Go to the "Utilities" menu across the top of your monitor screen and click on "Check Designer", this will open a template of your checkform.
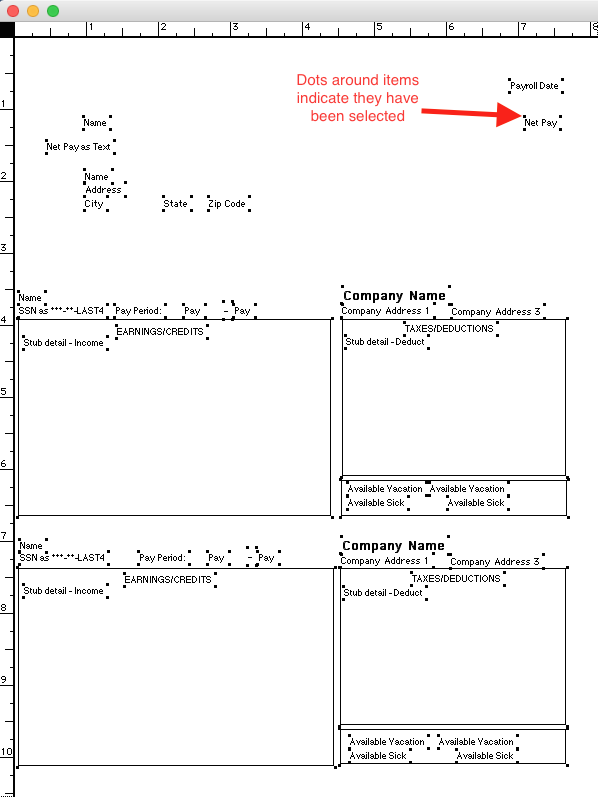
- Go to the "Edit" menu and click on "Select All", this will place dots around all of the items on the template, indicating they have been selected.
- Using the arrows on your keyboard, move the information in the direction to align it.
NOTE: 1/4 inch movement on the template is about 8 to 10 clicks on an arrow.
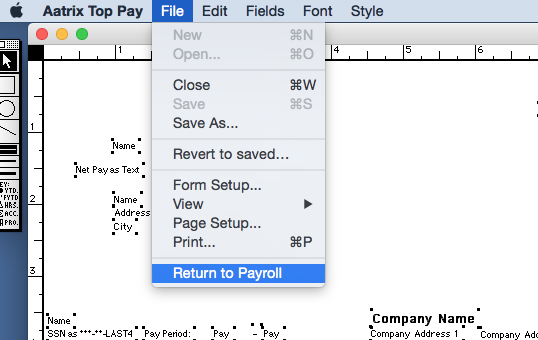
- When you have finished with the alignment, go to the File menu and select "Return to Payroll", when prompted, save the changes.
- Reprint the check again on plain paper and check the alignment.
- If further adjustment is necessary, repeat the above steps.
Related Pages:
Printing Paycheck Stubs in Quickbooks
FAQ: My checks are 3 per page and I will print the checks from Quickbooks. How do I get a paycheck stub for my employees?
Selecting a Checkform to Use
Learn how you can select checkforms from your Aatrix Payroll program.
Adding a Company Name and Address to Paycheck Stubs
Read on how to add your company name and address to paycheck stubs.
Getting Back to the Payroll Program
FAQ: I finished editing my checkforms and closed the window by clicking the button in the upper left corner, how do I get back to my payroll program?
Selecting Checkform for Direct Deposit Employees
Learn when and how to select a checkform for direct deposit employees.
