
Preparer Functions
Last modified by andrew k on 2026/03/18 23:38
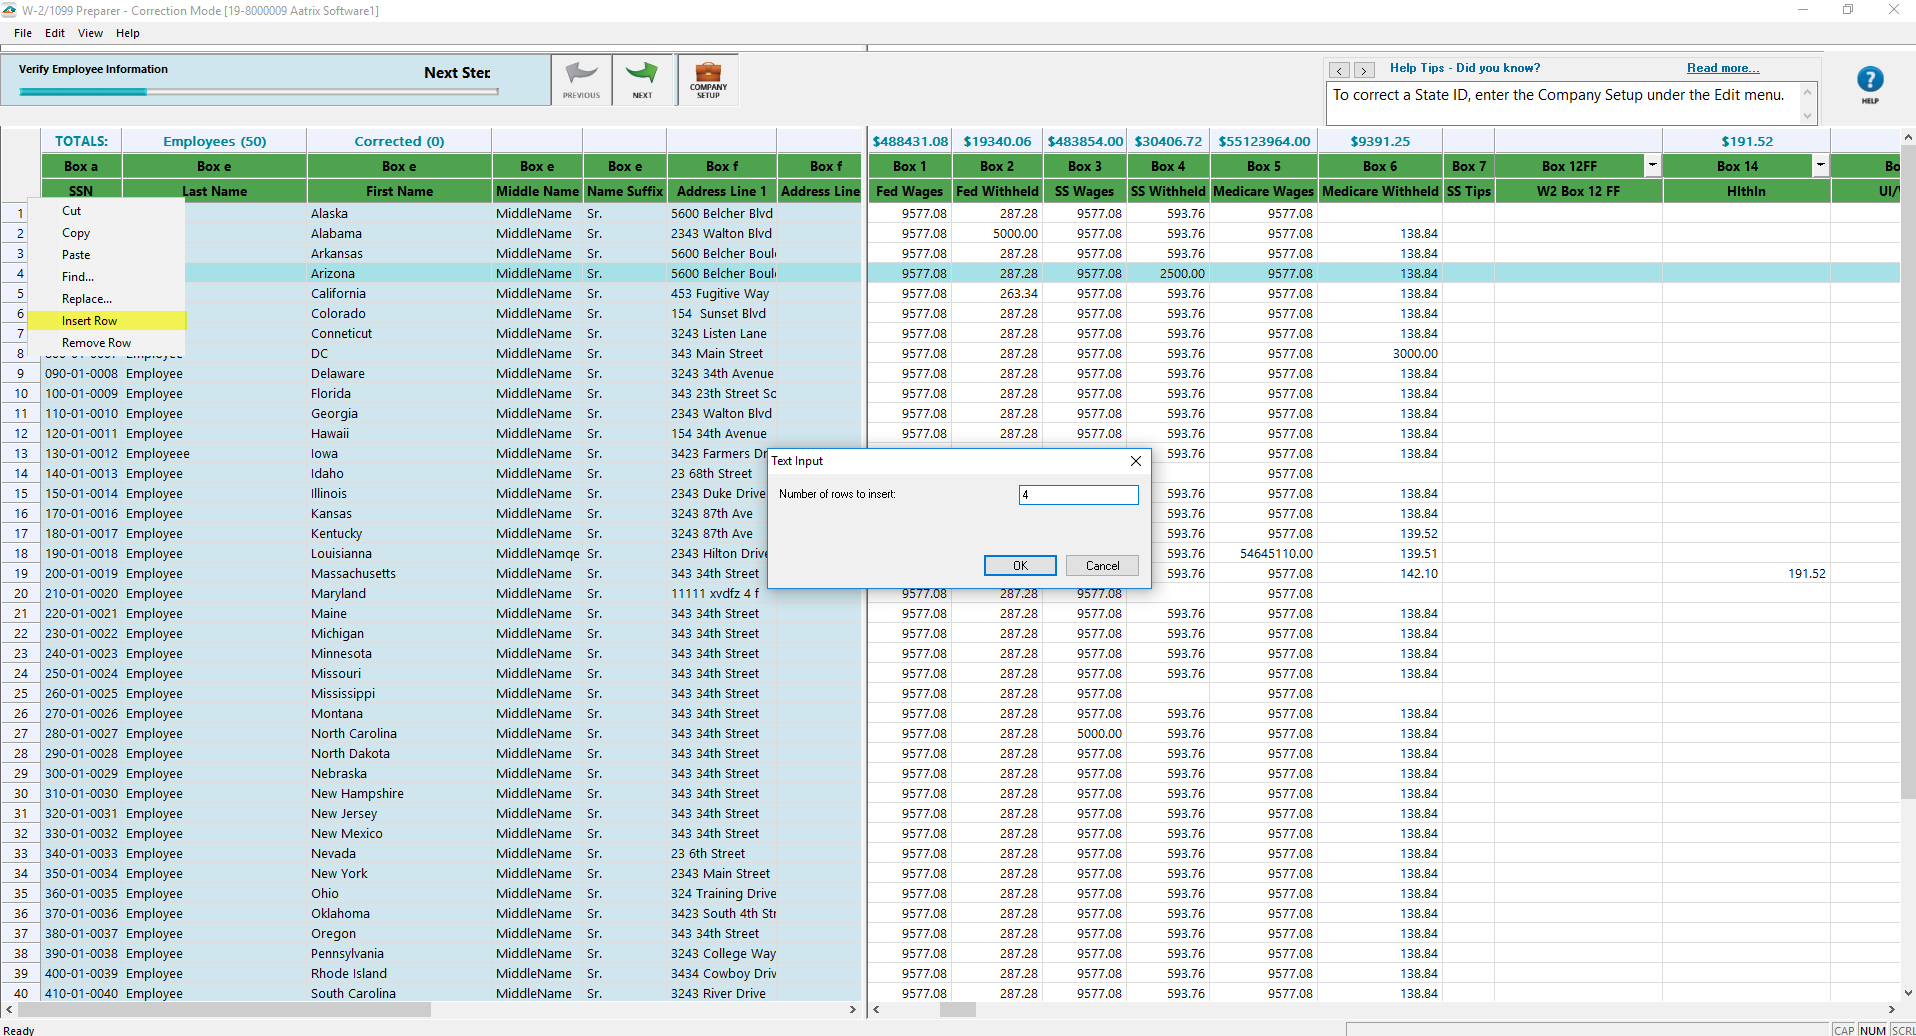
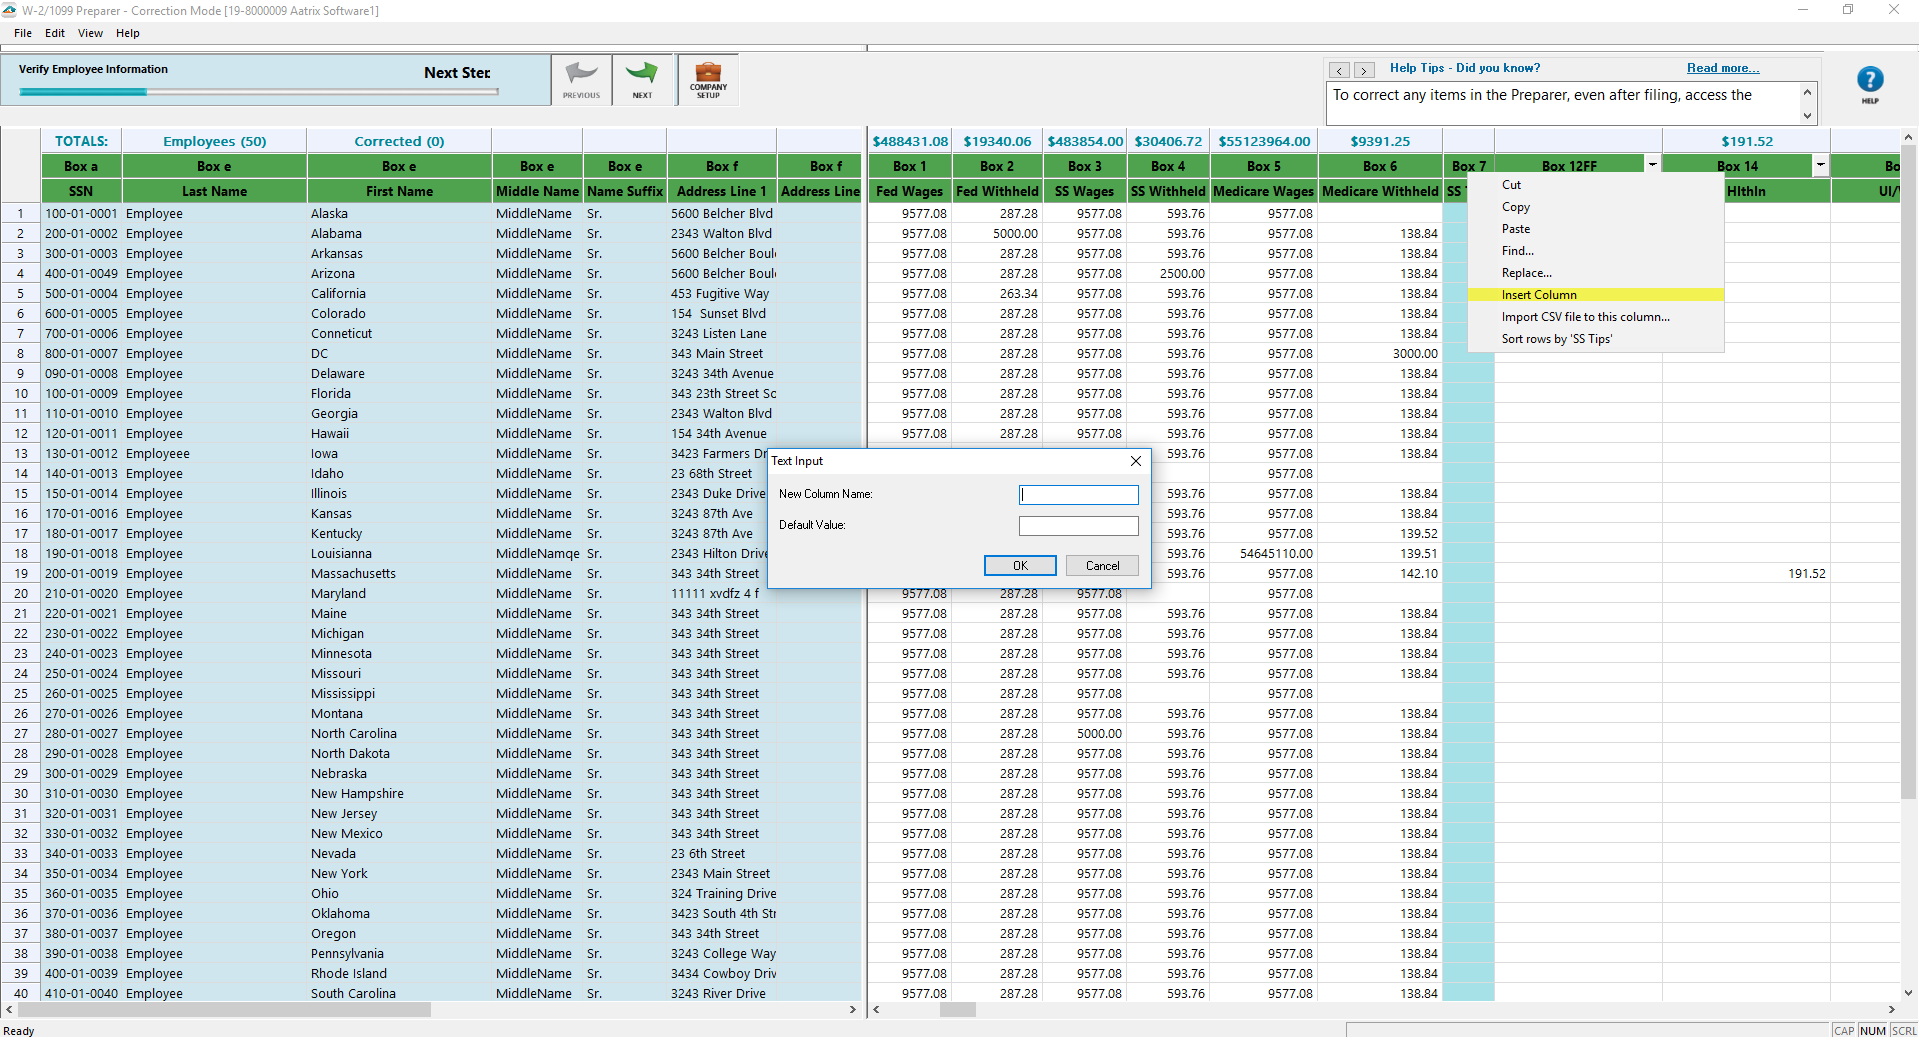
Add Row/Column
- Right-click on numbered row and choose to insert row. Then enter the number of rows you wish to enter.
- Right click on a column and choose to Insert. Then enter the Column name and a default value if desired.
Edit and choose to insert row or column.
Remove Row/Column
- Right-click on numbered row and choose to remove row
- A column can not be removed:
- If there is an unnecessary state or local column, remove this item from the company setup by going to the Edit menu and choose Company Info.
- If it is a column that was added and assigned. Unassign the column by clicking on the dropdown menu and select Unassign.
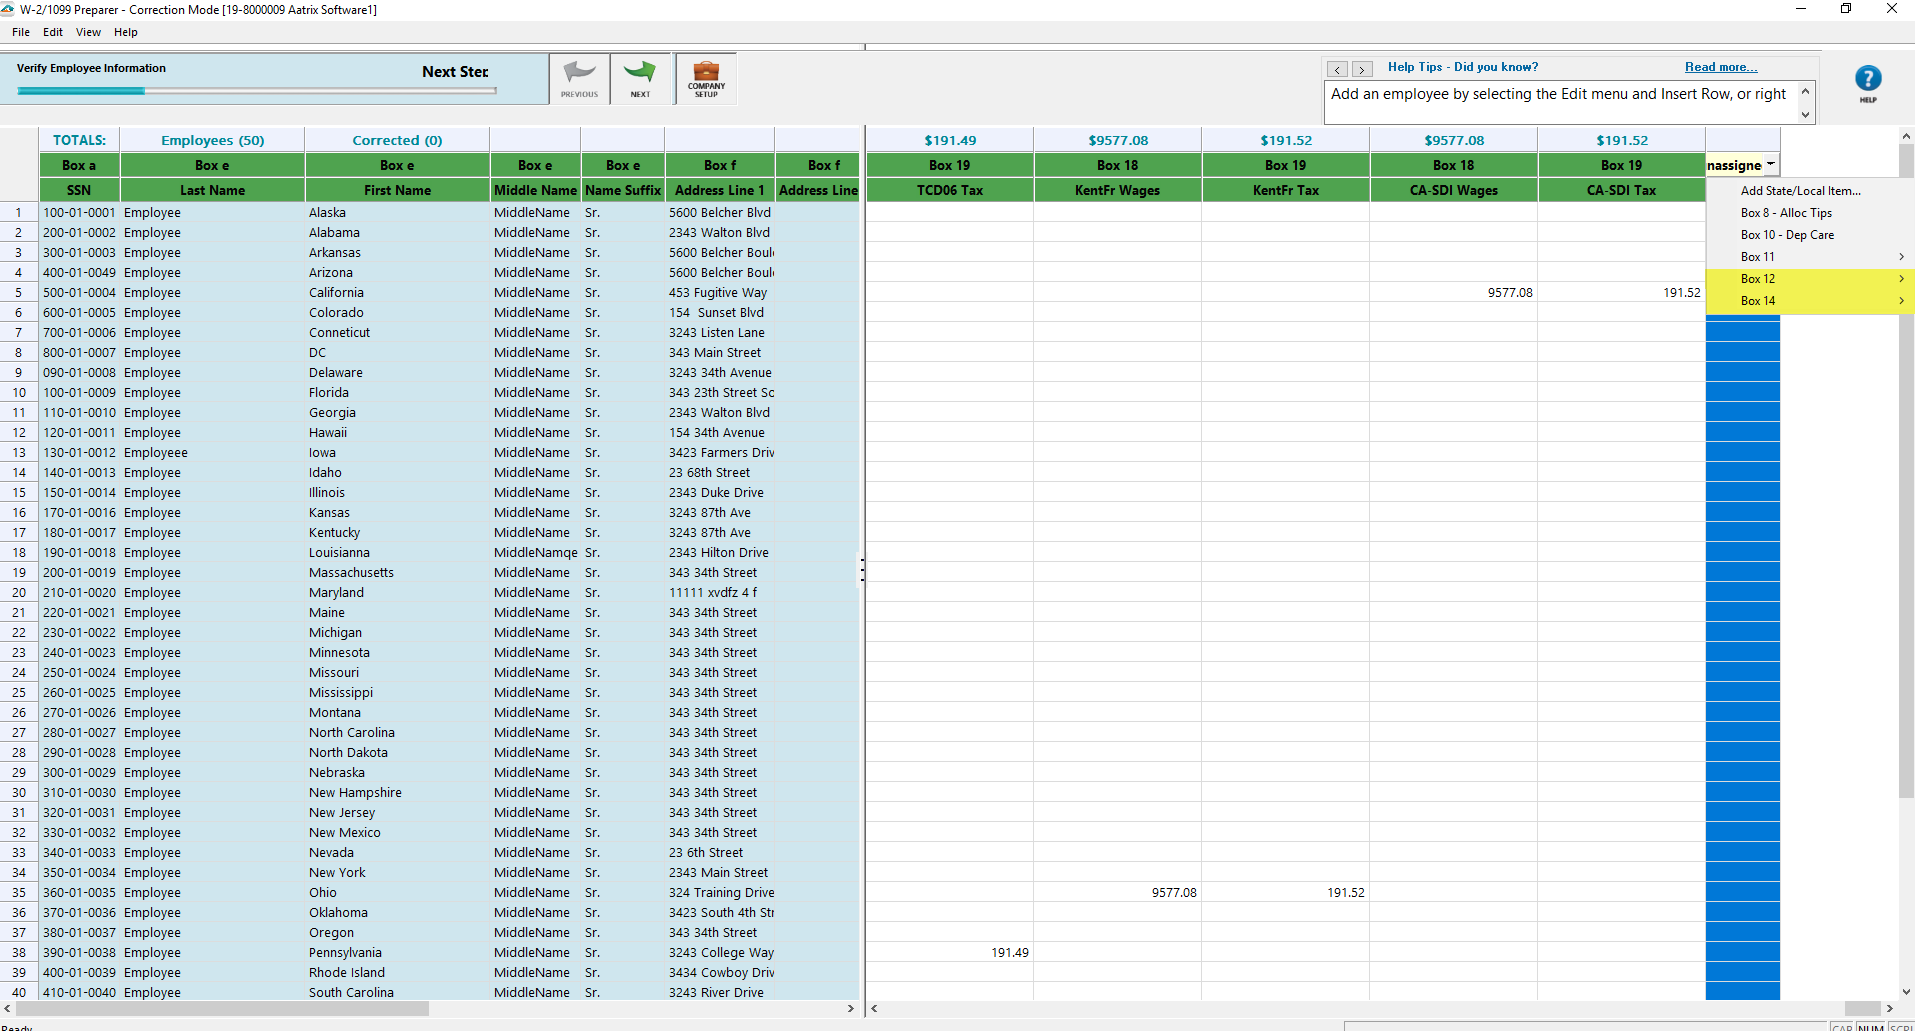
Link Box 12 & 14
- Insert the column. Enter in the name of the column. The Default Value is optional. The new column will appear with a yellow header that says Unassigned. To assign the column, select the dropdown menu, choose the box number from the dropdown menu. If adding a Box 11, 12, or 14, there will be an additional menu to select further details.
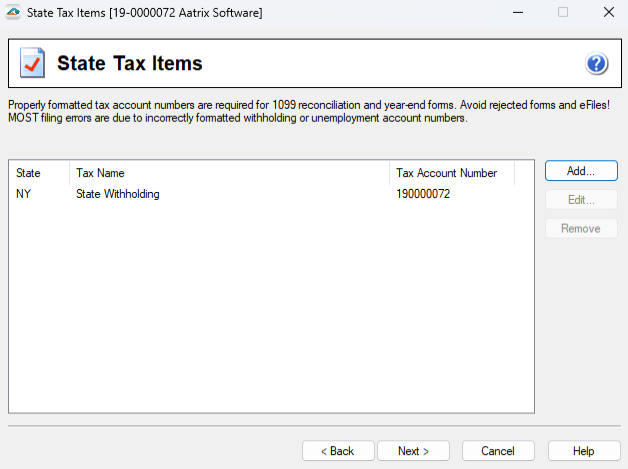
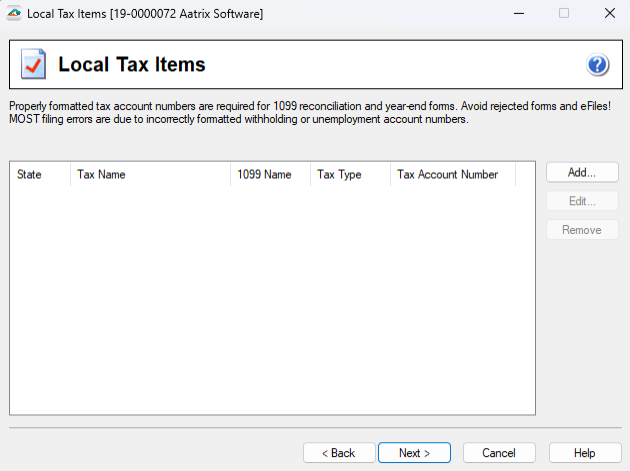
State and Local Tax Items
To access the Company Setup while in the Preparer, go to the Edit menu and choose Company Info.
- On the State & Local Tax Items screen is where you can Add, Edit, or Remove state and local tax items.
Notes:
If attempting to remove a state or local item but the Remove button is grayed out, the amounts for that state or local item will have to be zeroed out in the Preparer instead. The Remove option will not be available in corrections mode.
To change the format of a state account number, choose the "..." off to the right of the account number and select the appropriate format.
Correct Company Information
- To change the address, update the item in the Company Setup by going to Edit menu and choose Company Info. Change the company information on the Company Information screen.
Data Verification (W-2s)
When an employee is exempt from any part of Medicare or Social Security taxes then this must be indicated on the Data Verification screen within the Company Setup. Once this is indicated as Yes, that fatal error message will now have an option to Continue without Correcting, making it a nonfatal error.
If you wish to use control numbers on your W-2 forms, indicate Yes to have the Employee ID column display in the Preparer.
If employees have elected to receive only an electronic-only copy of their W-2, indicate Yes to have the Electronic W-2 and Email Address columns appear in the Preparer.
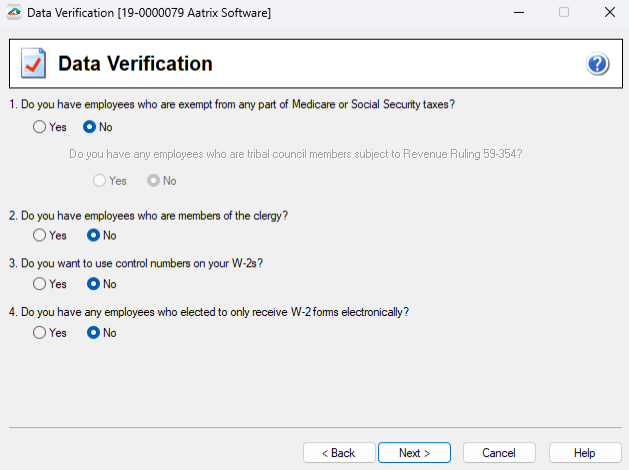
Note: If your electronic W-2 option is grayed out, this indicates that your payroll software is passing electronic only employees.
For Additional Functions :
- Incorrect Data Populating into Preparer
- Merging
- Social Security Number Information
- 1099 Error Checking
- Foreign Employees
- W-2 Error Checking
- NJ Wage and Tax Formats